Creating engaging TikTok videos often hinges on one critical factor: good lighting. Poor lighting can make even the most creative content appear dull, unprofessional, or hard to see. Fortunately, fixing bad lighting in your TikTok videos is achievable with simple techniques and adjustments. Whether you're filming indoors or outdoors, understanding how to optimize your lighting setup can dramatically enhance the quality of your videos and help you stand out on the platform.
How to Fix Bad Lighting in Tiktok Videos?
Lighting plays a pivotal role in video quality, influencing how viewers perceive your content. Bad lighting can result in grainy images, shadows, or washed-out visuals. To improve your TikTok videos, you need to identify the causes of poor lighting and apply practical solutions. Below are comprehensive steps to help you achieve well-lit, professional-looking TikTok videos.
1. Assess and Identify the Source of Poor Lighting
Before making adjustments, analyze your current lighting situation:
- Is the scene too dark? - You may need more light or better positioning.
- Are there harsh shadows or uneven lighting? - This indicates inconsistent light sources.
- Is the lighting color warm or cool? - Mismatched color temperatures can affect the video's mood.
Understanding these factors helps you choose the right fixes, whether it's adding light sources, adjusting angles, or changing locations.
2. Use Natural Light Effectively
Natural light is one of the most accessible and flattering lighting sources for TikTok videos. Here's how to harness it:
- Film Near Windows: Position yourself facing or beside a window during the day to get soft, even light.
- Avoid Direct Sunlight: Direct sunlight can cause harsh shadows and overexposure. Opt for diffused sunlight or film during cloudy days.
- Time Your Shoots: Golden hour (shortly after sunrise or before sunset) provides warm, diffuse light ideal for videos.
- Use Sheer Curtains: If sunlight is too intense, diffuse it with curtains to soften the light.
Natural light enhances your appearance and adds a professional touch without extra equipment.
3. Invest in Basic Artificial Lighting
If natural light isn't enough or isn't available, artificial lighting can dramatically improve your video's quality:
- Ring Lights: Popular among TikTok creators, ring lights provide even, flattering light that reduces shadows. They are adjustable and easy to set up.
- Softbox Lights: These diffuse light sources mimic natural soft light, ideal for indoor shoots.
- LED Panel Lights: Versatile and portable, LED panels allow you to control brightness and color temperature.
When choosing lights, prioritize adjustable brightness and color temperature settings to match your environment and desired aesthetic.
4. Position Your Lighting Correctly
Proper placement of lights can make a significant difference:
- Front Lighting: Position lights facing you to illuminate your face evenly, minimizing shadows.
- Side Lighting: Adds depth and dimension but should be balanced to avoid harsh shadows.
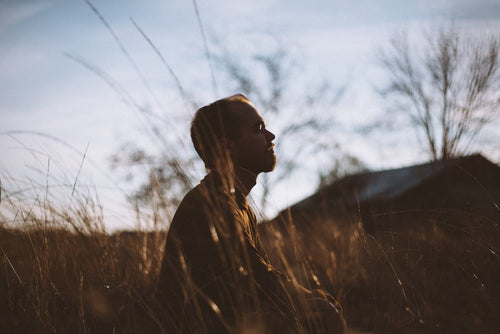
- Back Lighting: Creates a silhouette effect; use it carefully or combine with front lighting for better visibility.
Experiment with angles and distances to find the most flattering and clear lighting setup for your videos.
5. Adjust Camera Settings and Use Editing Tools
Sometimes, lighting issues can be mitigated through camera or app settings:
- Increase Exposure: Adjust exposure in your camera app to brighten dark scenes.
- Use Filters and Editing Tools: TikTok and other editing apps offer filters, brightness, contrast, and shadows adjustments to enhance lighting after recording.
- Enable HDR Mode: High Dynamic Range can improve detail in bright and dark areas.
Post-production edits can salvage footage with less-than-ideal lighting conditions, but it's best to get it right during filming.
6. Minimize Shadows and Glare
Shadows and glare can diminish video quality. To minimize these:
- Diffuse Light Sources: Use diffusers, softboxes, or even a white sheet to soften harsh light.
- Adjust Light Angles: Change the position of your lights to reduce shadow formation.
- Avoid Overhead Lights: Overhead lighting can create unflattering shadows on your face.
Proper diffusion and positioning will help achieve a balanced and professional appearance.
7. Maintain Consistent Lighting Throughout Your Video
Inconsistent lighting can distract viewers. Here’s how to maintain uniformity:
- Use Continuous Light Sources: Avoid flickering or fluctuating lights.
- Set and Lock Settings: Once you've adjusted brightness and color temperature, lock the settings if possible.
- Recheck Lighting During Filming: Keep an eye on your light setup, especially if filming over extended periods or moving locations.
Consistency ensures your video looks cohesive and visually appealing.
8. Practice and Experiment for Optimal Results
Lighting optimization is often a matter of trial and error. Don’t hesitate to:
- Test different light positions and intensities.
- Try various times of day for natural light.
- Use different filters and post-processing techniques.
With practice, you'll develop an intuitive sense of what works best for your specific environment and style.
Conclusion: Key Takeaways for Better TikTok Lighting
Improving bad lighting in TikTok videos is achievable through a combination of natural light utilization, investment in affordable artificial lights, strategic positioning, and post-production adjustments. Always assess your current lighting setup, experiment with different techniques, and maintain consistency throughout your recordings. Remember, good lighting enhances your content's clarity, professionalism, and overall appeal, helping you grow your audience and make your videos truly shine. With these tips, you'll be able to create bright, vibrant TikTok videos that capture attention and elevate your social media presence.
